Getting started
Welcome
Are you interested in taking your newsletter sendout to the next step? XML is an effective way to automate and speed up the process of creating a newsletter by filling it with information you already have. Below, you can learn more about the different XML solutions APSIS can deliver.Which XML solution fits your needs?
Module
The XML Module is perfect for you who want to be able to easily import data to an already existing newsletter.
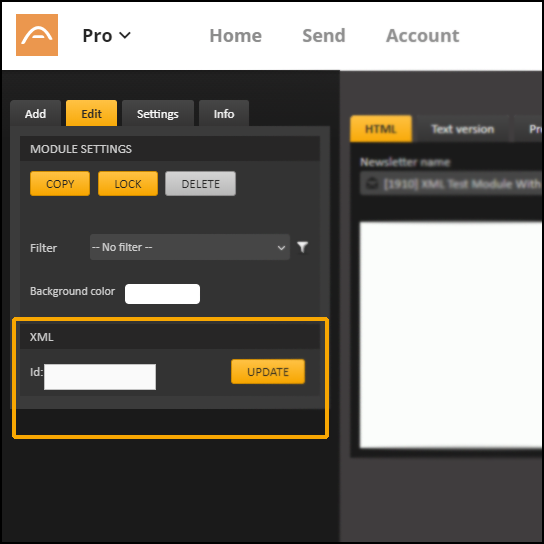
Module with ID
The XML Module with ID is when you want to be able to import data for one or multiple products to an already existing newsletter.
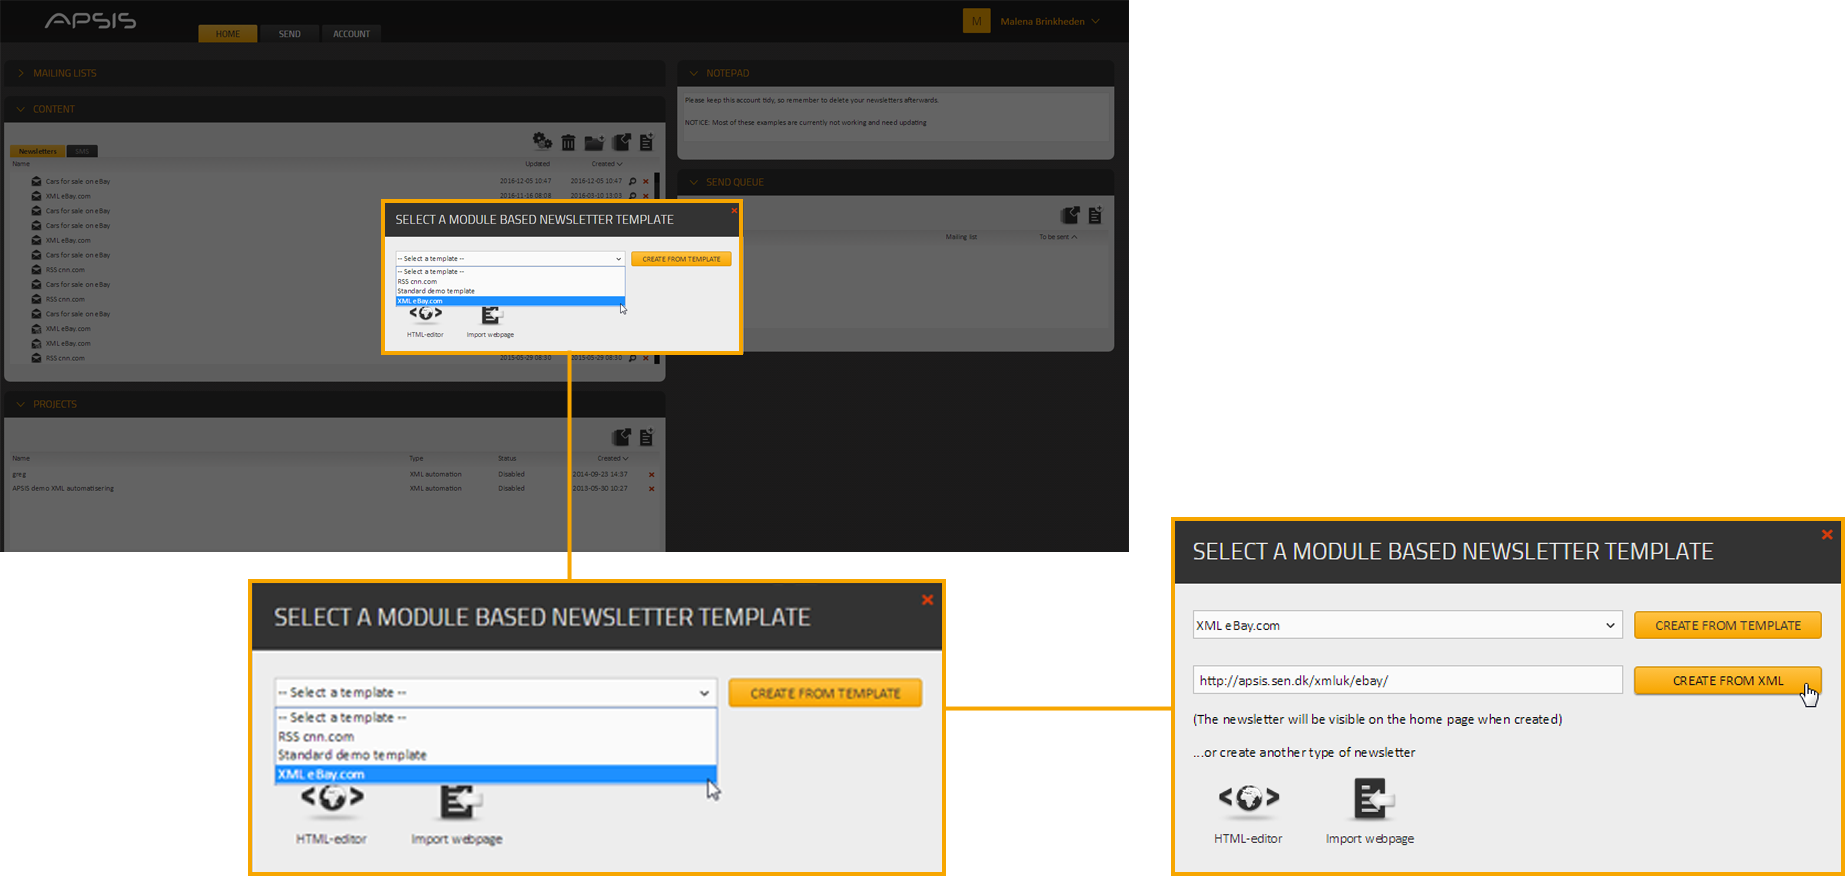
Newsletter
The XML Newsletter is the choice for you if you want to create a sendout in full from data obtained from an XML feed.